Updated for Version “Luna V”
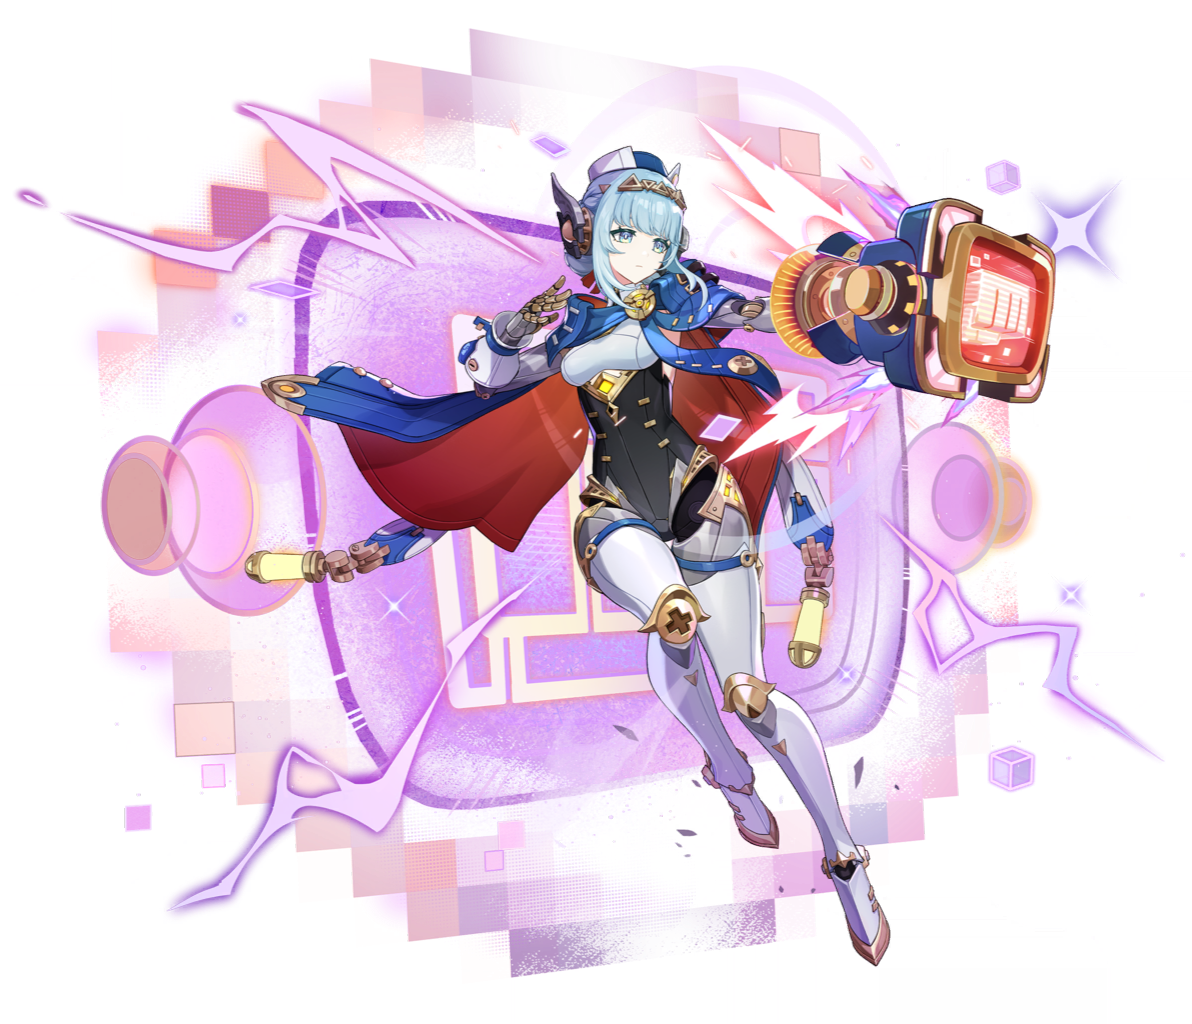
Ineffa is a 5★ Electro Polearm character in Genshin Impact who specializes in dealing and enabling a unique Electro-Charged reaction variant — Lunar-Charged. Learn about Ineffa’s best builds, best weapons, best artifacts, and best teams in this quick guide.
Note that the information given may change if new discoveries are made. More extensive testing is in progress.
Join our Discord to check on and participate in the theorycrafting process.
Table of Contents
New Content
Nefer | Nefer mostly uses Ineffa for her shield and EM buffing passive. |
Jahoda | Jahoda is a decent healer and 4pc VV debuffer in Lunar-Charged teams. Her buffing capability greatly increases at C6. |
Durin | Durin takes advantage of the Electro–Hydro double auras to deal sizable Vape and Overloaded damage while buffing the team’s Lunar-Charged damage with his Electro RES Shred. |
    Hexerei Buffs | In Version Luna III, some characters received a kit buff from the introduction of the Hexerei faction. Among them, Fischl is the most notable with her EM buff that benefits Ineffa Lunar-Charged teams. |
Columbina | The premier Hydro support for Lunar-Charged teams thanks to her powerful buffs and good personal damage. |
Zibai | Zibai teams can use Ineffa for her respectful personal damage. |
 Sacrificer’s Staff | A strong 4-star weapon for Ineffa, especially if she can make use of its ER passive to use her Burst more frequently. |
 4pc Aubade of Morningstar and Moon | Ineffa’s best set for personal damage when she is played off-field in an Ascendant Gleam team. |
 4pc A Day Carved From Rising Winds | A slightly better option than 2pc mixed sets to use as placeholders while farming for 4pc Aubade. |
Infographic
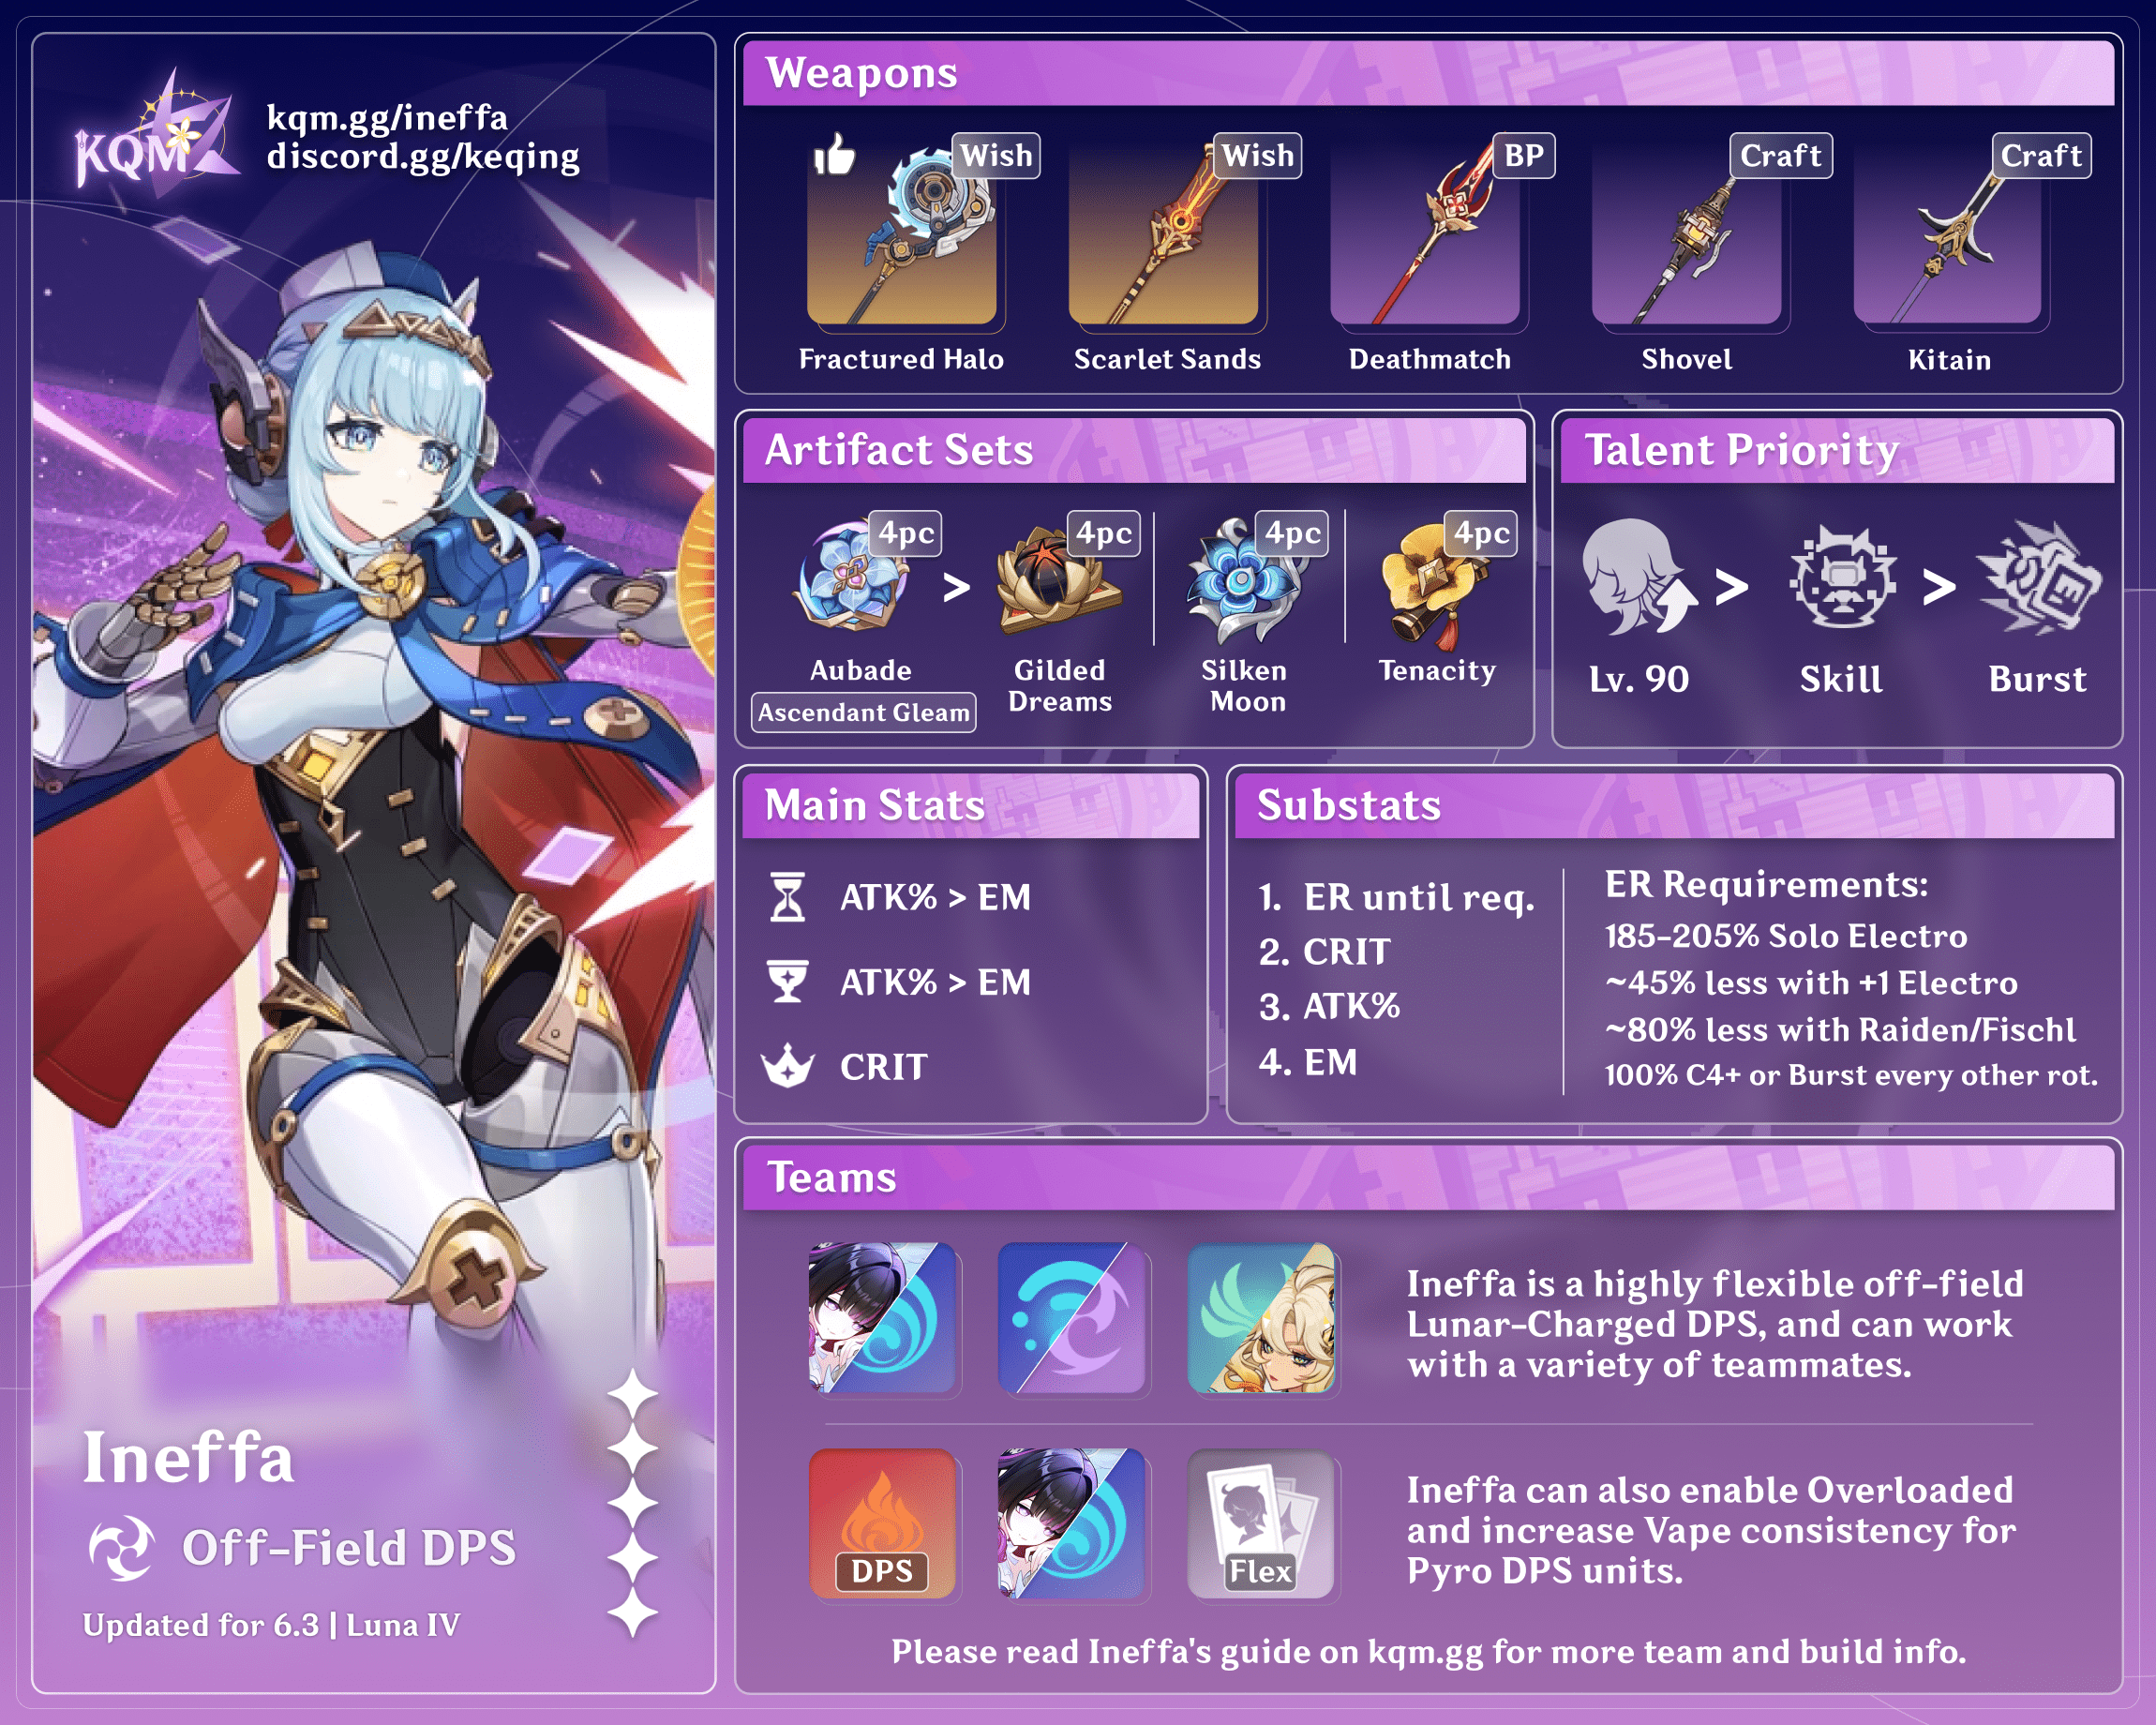
Credits to: auraolis, euphorysm, cegewinne, acerbus, heartofhope
Character Overview
Playstyles
Lunar-Charged DPS
Ineffa converts Electro-Charged into Lunar-Charged, a special reaction whose damage formula takes all participants’ stats into account. She also deals great off-field direct Lunar-Charged damage on her own and provides a shield with long-lasting duration.
Hyperbloom / Overloaded Trigger
With long-lasting off-field Electro application that has a decent hit rate, Ineffa is a good pick as a Hyperbloom / Overloaded trigger.
General Support
With a good shield and consistent off-field Electro application, Ineffa can be a flexible support for many teams.
Lunar-Charged
Lunar-Charged (LC) is a unique Electro–Hydro reaction that replaces Electro-Charged (EC) when Ineffa, Flins or Columbina is on the team. More intensive testing is being conducted, but for now, here is our current understanding of this special reaction:
- When the enemy has both Electro and Hydro auras, LC is triggered. Much like EC, LC does not exhaust both reacting auras instantly; Electro and Hydro auras can coexist with each other while LC is ongoing. These double auras behave similarly to normal EC’s double auras when reacting with incoming Elemental Application (further information about Reaction Priority can be found here).
- When LC is triggered, a thundercloud visual will appear. Around every 2s, the thundercloud attacks all enemies affected by both Electro and Hydro auras, dealing LC reaction damage, which is considered Electro damage. Note that the damage dealt by the reaction does not apply Electro or Hydro.
- All conditions that require triggering EC or enemies taking EC damage (e.g. Neuvillette’s A1 Passive, Ororon’s A1 Passive) have also been updated to work with LC.
Lunar-Charged Reaction Damage
Here is the list of what can affect the damage of LC:
- A fixed reaction multiplier
- Character level
- Characters’ EM
- Characters’ Reaction Base DMG buff (Ineffa’s and Flins’s Moonsign Benediction passive)
- Characters’ Reaction DMG Bonus (e.g. 4pc TF, 4pc SMS, Aino’s C6, Mona’s C1)
- Characters’ CRIT Rate and CRIT DMG
- Enemies’ Electro RES
- But not enemies’ DEF (to any significant degree)
What makes LC special is that its damage calculation formula uses the attributes of more than one character at a time. While old EC only cares about the EM stat of the most recent Electro / Hydro applier, LC takes into account all the Hydro and Electro characters (or Anemo characters, via Electro / Hydro Swirl) that apply Elements onto the target. The reaction uses their respective stats (EM, Reaction DMG Bonus, CRIT, etc.) to calculate the LC damage each of them would deal, then merges them together into one bigger LC damage instance. Thus, the more LC damage each participant deals individually, the larger the combined damage would become.
Notably, while every participant deals their own LC damage, there is a penalty for every extra LC trigger that joins in the damage formula. When recording each character’s LC damage, the game keeps the highest individual LC damage intact, while halving the damage dealt by the second, and further reducing the damage from the third or fourth unit (to a twelfth of it). This means that while all participants contribute their own damage, only the contribution of the highest and second highest LC damage dealers really matter for the final LC damage result. As a result, it is less punishing to have support characters that are not built for LC damage as their damage contribution is already insignificant in the first place. Alternatively, some characters with a kit that is not intended to deal good Talent damage can still dish out respectable LC damage by building to be the main reaction damage contributors.
More worthily, despite being a Transformative Reaction, LC can CRIT, and it uses the CRIT stats of the reaction participants. As such, players can build for LC damage by investing in both EM and CRIT stats. This means that on top of the traditional Transformative Reaction damage dealers with their high EM build (Kazuha, Sucrose), characters with a CRIT build can still deal decent LC damage without sacrificing much of their Talent damage to build EM. Additionally, while LC damage is not negligible, it is just a humble damage proportion to characters with good Talent scalings. As such, it is recommended for most characters to use their normal build in LC teams for the sake of playstyle flexibility without much performance disparity.
In general, CRIT stats will be better to invest in for overall damage on DPS characters in Lunar-Charged teams; CRIT Rate and CRIT DMG benefit both the character’s Talent damage and their Lunar-Charged damage, making them the highest-priority stats for their build. Depending on the proportion of their LC to Talent damage, CRIT is then followed by either EM or ATK / HP.
For supports, they can stack a combination of CRIT and EM after they reach whatever stat breakpoints they have. Whether EM or CRIT is better to focus on will depend on what available pieces and substats you have, so we recommend you check with Genshin Optimizer when building purely for LC damage. Additionally, building for LC damage on your supports is rarely worth the Resin if their LC damage doesn’t become the highest or second highest in the team.
TL;DR — LC damage scales off the EM and CRIT stats of all the Electro and Hydro appliers involved in the reaction. However, only the character who deals the highest individual LC damage contributes significantly to the final LC damage.
Direct Lunar-Charged Damage
Some of Ineffa’s special attacks (A1, C2, C6) are considered LC damage. They use all the stats mentioned above, but with their own ATK scaling and a hidden x3 multiplier instead of the fixed reaction multiplier and the character level multiplier. They are still affected by her EM, her CRIT, and enemies’ Electro RES but not by enemies’ DEF. For the purposes of this guide, direct Lunar-Charged damage refers to that which originates from Ineffa’s A1 Passive and Constellations, while Lunar-Charged reaction damage refers to that which originates solely from triggering the Elemental Reaction.
In the same vein, Flins’s direct Lunar-Charged damage behaves similarly to that of Ineffa.
Talents
Level and Talent Priority
Level 90 is highly recommended to maximize Ineffa’s Lunar-Charged damage.
Character Level > Skill > Burst >> Normal Attack
Most of Ineffa’s damage comes from her A1 Passive damage and Lunar-Charged reaction, so leveling her Skill and Burst for damage is a lower priority. However, Ineffa’s Skill levels are important for its shield strength. Her Normal Attack should not be leveled.
Talent Overview
 Normal Attack | Cyclonic Duster
Talent Description
Normal Attack
Performs up to 4 consecutive spear strikes.
Charged Attack
Consumes a certain amount of Stamina to perform a spinning attack.
Plunging Attack
Plunges from mid-air to strike the ground below, damaging opponents along the path and dealing AoE DMG upon impact.
Basic Physical damage attacks that are not used during a typical rotation.
 Elemental Skill | Cleaning Mode: Carrier Frequency
Talent Description
Ineffa engages her Enhanced Cleaning Module, dealing a single instance of AoE Electro DMG to nearby opponents, activating her Optical Flow Shield Barrier, and summoning the Multipurpose Smart Assistance Unit, Birgitta.
The Optical Flow Shield Barrier absorbs DMG based on Ineffa’s ATK, and it will absorb Electro DMG with 250% effectiveness.
Brigitta
Ineffa’s assistant and companion in battle, she can be summoned to the battlefield via Elemental Skill or Elemental Burst.
If there are opponents nearby, Birgitta will quickly move close to an opponent and unleash Discharge attacks every 2s, dealing AoE Electro DMG.
Only one Birgitta that has been summoned by Ineffa herself can exist at any one time.
Ineffa deals a single instance of AoE Electro damage upon casting her Skill, then she deploys a shield and Birgitta that both last 20s. Ineffa’s shield scales off her ATK, which synergizes nicely with her A1 Lunar-Charged damage and A4 and Moonsign Benediction team buffs. The shield is quite decent on an average build, and it is more effective at absorbing Electro damage.
Birgitta is a robot summon that periodically deals AoE damage to nearby opponents every 2s. While Birgitta’s Skill damage is not a significant part of Ineffa’s output, Birgitta can apply Electro every time it attacks. This allows Birgitta to contribute to the teamwide Lunar-Charged damage and enables consistent Lunar-Charged reactions for her Hydro teammates. Birgitta also has a chance to produce 1 Electro particle every time she attacks, so Ineffa’s particle generation is decent thanks to the high-uptime Birgitta.
 Elemental Burst | Supreme Instruction: Cyclonic Exterminator
Talent Description
Through Multipurpose Smart Assistance Unit, Birgitta, Ineffa can use Rocket Punches to quickly clean up opponents! Shoots Birgitta into the fray, dealing AoE Electro DMG and allowing Birgitta to remain on the field.
If Birgitta is already on the field, having been summoned by Ineffa, this Skill will re-summon Birgitta at the target’s location and reset her duration.
Ineffa deals a Burst hit and refreshes Birgitta’s duration. If Birgitta has not been on the field before casting her Burst, Ineffa will summon Birgitta instead.
 Ascension 1 Passive | Overclocking Circuit
Talent Description
If there are thunderclouds created by Lunar-Charged reactions nearby when Birgitta unleashes Discharge attacks, she will initiate an additional attack, dealing AoE Electro DMG equal to 65% of Ineffa’s ATK. This DMG is considered Lunar-Charged DMG.
When Birgitta initiates its damage-over-time attack, if there are thunderclouds nearby (indication of Lunar-Charged reaction), Birgitta will also deal an extra AoE Electro attack that is considered Lunar-Charged damage (read further about this reaction in the Lunar-Charged section). These additional attacks make up the majority of Ineffa’s damage.
 Ascension 4 Passive | Panoramic Permutation Protocol
Talent Description
When using the Elemental Burst Supreme Instruction: Cyclonic Exterminator, all your party members will gain the Parameter Permutation effect: Increases Ineffa and your own active party member’s Elemental Mastery by 6% of Ineffa’s ATK for 20s.
When using her Elemental Burst, Ineffa gives herself and the active character an EM buff based on her ATK, and there is no limit for this buff. This effect lasts for 20s.
This EM buff is good not only in Lunar-Charged teams, but also in other teams where the on-fielder benefits from EM stats such as Quicken.
Note that this passive’s EM buff does not use the ATK buffs that originate from a percentage of one character’s stat, for example Bennett and Iansan Burst.
 Moonsign Benediction Passive | Assemblage Hub
Talent Description
When a party member triggers the Electro-Charged reaction, it will be converted into the Lunar-Charged reaction, with every 100 ATK that Ineffa has increasing Lunar-Charged’s Base DMG by 0.7%, up to a maximum of 14%.
Additionally, when Ineffa is in the party, the party’s Moonsign will increase by 1 level.
Ineffa replaces the traditional Electro-Charged reaction with Lunar-Charged, and increases the Base DMG of Lunar-Charged reactions triggered by her team based on her ATK. The maximum amount of Lunar-Charged Base DMG Ineffa can offer this way is 14%, which requires her ATK to reach 2000. Note that this Base DMG Reaction Bonus is additive with the similar buff provided by Flins’s Moonsign Benediction Passive.
Read further about this reaction in the Lunar-Charged section.
Additionally, when Ineffa is in the team, the Moonsign Level is raised by 1. This benefits Nod-Krai characters by enabling part of their kits (Aino’s Q, Flins’s Q) or by enabling certain Moonsign-related gear such as 4pc NotSU or Prospector’s Shovel.
Constellations
 Constellation 1 | Rectifying Processor
Constellation Description
When Ineffa activates her Optical Flow Shield Barrier, all nearby party members will gain the Carrier Flow Composite effect for 20s: Increases Lunar-Charged DMG by 2.5% for every 100 ATK that Ineffa has, up to a maximum of 50%.
When Ineffa creates a shield (through her Skill), she increases the team’s Lunar-Charged DMG Bonus based on her ATK for 20s. Ineffa can easily cap out this buff at 50% Reaction DMG Bonus with 2000 ATK, which is the same as her Moonsign Benediction’s buff. This Constellation is a good increase not only to her personal damage, but also to the Lunar-Charged damage dealt by her teammates.
 Constellation 2 | Support Cleaning Module
Constellation Description
After the Elemental Burst Supreme Instruction: Cyclonic Exterminator hits opponents, it will inflict the Punishment Edict status on one of those hit opponents: After a brief delay, or when this opponent is defeated, nearby opponents will take AoE Electro DMG equal to 300% of Ineffa’s ATK. This DMG is considered Lunar-Charged DMG.
Additionally, when the Elemental Burst Supreme Instruction: Cyclonic Exterminator is unleashed, nearby party members will gain Optical Flow Shield Barriers.
Ineffa’s Burst inflicts a mark on one of the enemies hit by it. After a brief delay or when the marked enemy is attacked, the mark explodes, dealing one instance of Lunar-Charged DMG based on her ATK. The damage formula for this damage instance is similar to that of her A1 Passive and is elaborated on in the Lunar-Charged section. Ineffa’s C2 is most impactful when she already uses her Burst every rotation as it incentivizes investment in sufficient ER. Additionally, Ineffa’s Burst can now summon the shield and activate her C1, thus increasing her shield uptime on teams with rotations longer than 20s.
Overall, this Constellation is both a good damage gain and a defensive improvement, which makes it a good stopping point as her C3 is not as impactful.
 Constellation 3 | Enhanced Emotion Emulator
Constellation Description
Increases the Level of Cleaning Mode: Carrier Frequency by 3.
Maximum upgrade level is 15.
Most of Ineffa’s damage concentrates in her A1 and Lunar-Charged reactions, so raising Skill levels by 3 only gives her a modest damage increase and an improvement to an already good shield.
 Constellation 4 | The Edictless Path
Constellation Description
When your own party members trigger Lunar-Charged reactions, recover 5 Elemental Energy. This effect can occur once every 4s.
The value of the Energy refund this Constellation gives Ineffa heavily depends on her initial ER requirements. Her C4 is most helpful in teams where Ineffa is the only Electro unit, and it becomes less valuable with the inclusion of more Electro teammates.
 Constellation 5 | Mirror’s Dream Transcension
Constellation Description
Increases the Level of Supreme Instruction: Cyclonic Exterminator by 3.
Maximum upgrade level is 15.
Similar to Ineffa’s C3, a Constellation that increases Talent levels is not noteworthy for a character whose damage profile consists mainly of reaction and Ascension Passive damage.
 Constellation 6 | A Dawning Morn for You
Constellation Description
When Ineffa is affected by the Carrier Flow Composite effect, she will deal AoE Electro DMG equal to 135% of her ATK to opponents in the current active character’s vicinity after nearby thunderclouds release bursts of lightning at opponents. This DMG is considered Lunar-Charged DMG. The aforementioned effect can trigger once every 3.5s.
When Ineffa’s C1 effect is active, she deals an additional attack every time Lunar-Charged damage is dealt on the enemies. This attack is also considered Lunar-Charged damage with the same special multiplier as her A1 and can be triggered every 3.5s (close to 4s with how often Lunar-Charged deals damage). This is Ineffa’s best Constellation for personal damage output.
Combos
Combo Notation
- E = Elemental Skill
- Q = Elemental Burst
| E Q | Ineffa’s most common combo, suitable for most teams with a traditional ~16–20s rotation. |
| E/Q > Team > Q/E | Ineffa can space out her Skill and Burst use for better Birgitta uptime. This works well for longer rotations (<30s). |
Artifacts
ER Requirements
Calcs for ER requirements can be found here (last updated for Version Luna I).
The following table assumes 1 to 2 Favonius procs from Ineffa’s teammates. Additional Favonius procs lower Ineffa’s ER requirements by 10–30%. Ineffa’s C4 is assumed to provide 5 Flat Energy every 4s, or 1.25 Energy per second, although it can give less Energy in teams with poorer Lunar-Charged uptime.
| Baseline | Every Other Rotation | C4+ | |
| Double Electro (2 teammate Fav procs) | 140–160% | 100% | 100% |
| Double Electro with Fischl / Yae (25s rotations), or Raiden / Cyno (1 teammate Fav Proc) | 100–125% | 100% | 100% |
| Solo Electro (2 teammate Fav procs) | 185–205% | 120–135% | 105–120% |
| Solo Electro with Neuvillette, or Alhaitham (split rotation) (2 teammate Fav procs) | 150–155% | 100% | 100% |
R5 Kitain Cross Spear reduces Ineffa’s ER requirements to a minimum assuming she can trigger the passive twice. At most, her ER requirements with Kitain is 160–170% in teams where Ineffa is Solo Electro. With 2 Favonius procs from teammates, this drops to 120% and below. Ineffa does not have to build ER with Kitain and a second Electro.
Use the Energy Recharge Calculator to determine exact requirements for your team and rotation. For more details on how Favonius weapons will affect your team, please use Ac1d’s Favonius Mastersheet.
Artifact Stats
 Sands |  Goblet |  Circlet |
| ATK% > EM / ER* | ATK% > EM | CRIT |
Stat Priority: ER (until requirement)* > CRIT > ATK% > EM
*Generally, Ineffa only builds for ER to Burst every rotation when her ER requirements are below ~140%; otherwise, not building ER and Bursting every other rotation would yield more personal DPS. However, Ineffa can still Burst every rotation at higher ER requirements at a cost of lower personal DPS in some scenarios, for example when her EM buff is greatly appreciated by the on-field damage dealer, or when her Birgitta / Electro application uptime without Burst refresh is shorter than the rotation length.
Ineffa builds CRIT to maximize both her Lunar-Charged reaction damage and her A1 Passive damage. ATK% generally performs better than EM, especially when Ineffa already gets a decent amount of EM and Lunar-Charged Reaction DMG% buffs. Building ATK% also increases Ineffa’s shield and A4 buff.
For a Hyperbloom-focused build, Ineffa trades ATK% and CRIT for more EM depending on the relative ratio between Hyperbloom and Lunar-Charged damage. If the team does not allow for many Lunar-Charged procs, a full EM build is preferred for Hyperbloom damage.
Ineffa may use an Electro DMG Bonus Goblet in a Pure Quicken team. Additionally, a full ATK build is viable when only Ineffa’s shield and EM buff are needed.
Artifact Sets
4pc Aubade of Morningstar and Moon (Aubade) | Ineffa’s best set for personal damage output in teams with other Moonsign characters thanks to its large Lunar Reaction DMG% self-buff. Even in teams where Ineffa is the only Moonsign character, 4pc Aubade is still a decent set with 80 EM and 20% Lunar-Charged DMG%, making it her most recommended set for general use. Nevertheless, this set incentivizes the use of a second Moonsign character for Ineffa teams. |
 4pc Silken’s Moon Serenade (SMS) | Ineffa can trigger and maintain 4pc SMS’s effect easily with her long-lasting Skill. Depending on the team’s Moonsign Level, the set can provide a teamwide 60 or 120 EM buff (at Nascent and Ascendant Gleam, respectively). Additionally, it gives all party members 10% Lunar Reaction DMG Bonus (including Lunar-Charged). Naturally, Ineffa is a good 4pc SMS holder as she uses all the stats provided by the set quite well. However, letting one of Ineffa’s teammates run this set is often a better decision that allows her to run a different set (e.g. 4pc Aubade) for her personal damage. |
 4pc Gilded Dreams (GD) | 4pc GD can be used as the placeholder while farming for 4pc Aubade, or in teams without any Moonsign teammate for 4pc Aubade’s Ascendant Gleam effect. She can use both the EM and ATK% buffs of 4pc GD without any issue. In a team with a second Electro unit, 4pc GD gives Ineffa 100 EM and 14% ATK. Meanwhile, she gains 150 EM from the 4pc effect as the only Electro character in the team. |
 4pc Night of the Sky’s Unveiling (NotSU) | 4pc NotSU is more suited to an on-field DPS playstyle since its 4pc effect lasts for only 4s. However, Ineffa can use it if she maintains plenty of field time or swaps in frequently. 4pc NotSU performs better than any other set in these scenarios. |
 2pc Mixed Sets | 2pc Bonuses: ATK%, EM, ER These 2pc combinations only perform slightly behind 4pc GD and can be stronger with better substats. These mixed sets are perfectly fine options to use if players do not wish to farm for 4pc GD. |
 4pc Thundering Fury (TF) | 4pc Thundering Fury is similar to mixed sets in DPS performance since it gives Lunar-Charged DMG Bonus in its 4pc effect as of Version 5.8. Its Elemental Skill cooldown–reducing passive is rarely useful on Ineffa as she can easily maintain full Birgitta uptime and shield duration. |
 Support Sets | 4pc Tenacity of the Millelith (TotM), Noblesse Oblige (NO), Deepwood Memories (DW), Scroll of the Hero of Cinder City (Scroll) Used when Ineffa is played as a shield support or when the teamwide buffs are more important than using a damage-focused set. |
 4pc Golden Troupe (GT) | As Ineffa’s Lunar-Charged damage does not benefit from DMG Bonus buffs, Golden Troupe (both 2pc and 4pc) is a bad artifact choice. However, 4pc GT is one of Ineffa’s strongest sets for Quicken teams. |
 4pc Flower of Paradise Lost (FoPL) | Good option for a Hyperbloom team, but 4pc GD tends to be better as it also buffs her occasional Lunar-Charged damage. |
Weapons
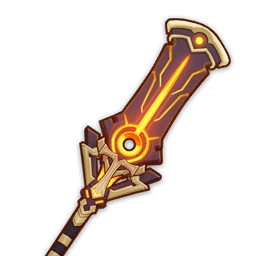
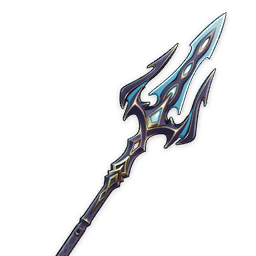
 5★ Fractured Halo | Ineffa’s signature and BiS weapon for both team and personal damage thanks to the 40% Lunar-Charged DMG Bonus and 24% ATK. Note that this buff lasts the whole 20s after Ineffa generates a shield, regardless of whether the shield remains unbroken for such duration or not. Fractured Halo deals ~30–35% more damage than Missive Windspear. |
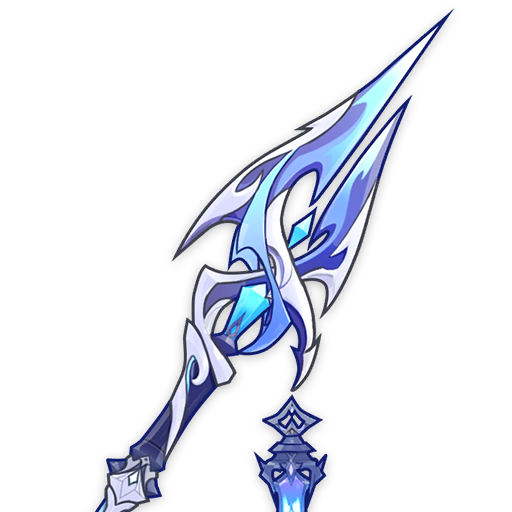
 5★ Staff of the Scarlet Sands | The weapon’s EM-to-ATK conversion passive makes EM comparable to and sometimes better than ATK for Ineffa’s personal damage. Scarlet Sands performs the best for on-field Ineffa, where the weapon passive is always active, but it is still her second-best option even when off-field. Note that the ATK Bonus from this passive is not used in Ineffa’s A4 Passive where she gives an EM buff based on her ATK. Likewise, Ineffa’s A4 EM buff will not increase Scarlet Sands’ passive. If the team lacks EM or Lunar Reaction DMG% buffs, use EM ❘ EM ❘ CRIT DMG main stats on Ineffa with Scarlet Sands. Otherwise, use ATK% main stats as usual for her. |
 5★ Bloodsoaked Ruins | Bloodsoaked Ruins is one of Ineffa’s higher-end 5-star options thanks to its good statline and useful passive. It restores 12 Energy to Ineffa (practically) every rotation, thus greatly decreasing her ER requirements. The other parts of its passive are short-lived: the Lunar-Charged DMG Bonus only lasts 3.5s after Ineffa uses her Burst, and the CRIT DMG buff only lasts 6s after Lunar-Charged is triggered (while Ineffa is on-field). However, Ineffa can refresh the CRIT DMG buff frequently if she is played as an on-fielder or in a quickswap team. |
 5★ Staff of Homa, Lumidouce Elegy, Symphonist of Scents, Calamity Queller | Competitive 5-star options for Ineffa with a good balance between Base ATK and CRIT secondary stats even though she cannot utilize the full passives of these weapons (except Calamity).The abundance of Calamity Queller’s ATK stats helps Ineffa reach her 2000 ATK goal more easily and increases her A4 EM buff by a decent amount. |
 4★ Deathmatch | Deathmatch is one of Ineffa’s best 4-star weapons, and at Refinement Rank 5 it can compete with 5-star options such as Staff of Homa. It performs the best against one single target. |
 4★ Ballad of the Fjords | Ballad of the Fjords offers a similar damage output as Deathmatch at equal refinement, provided there are at least 3 Elements in the team. There is no need to get the other BP Polearm for Ineffa when players have Ballad, and vice versa. |
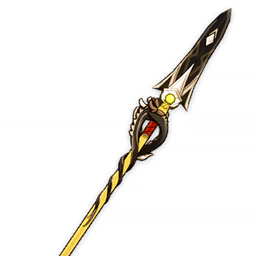
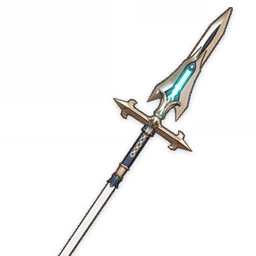
 5★ Crimson Moon’s Semblance, Primordial Jade Winged-Spear | Decent 5-star Polearms, albeit weaker than the above options due to the lower CRIT secondary stats and less-useful passives. Ineffa can only maintain PJWS’s passive while on-field, which is a niche playstyle. These two weapons perform on par with R1 Deathmatch and Ballad of the Fjords, but they have much worse DPS increase per refinement. |
 5★ Skyward Spine | Surprisingly decent 5-star Standard weapon with an ER secondary stat that can be useful for Ineffa in higher–ER requirement scenarios. Its performance plummets in Energy-rich environments or with Ineffa’s C4. |
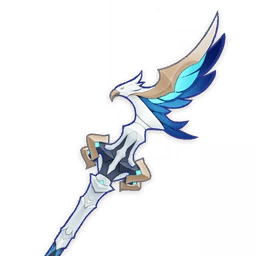
 5★ Vortex Vanquisher | Good option for on-field playstyles, where Ineffa can quickly stack and maintain the weapon passive. Decent option for off-field playstyles. |
 4★ Prospector’s Shovel | In a team of Moonsign: Ascendant Gleam, Prospector’s Shovel is Ineffa’s general best 4-star weapon after Deathmatch and Ballad of the Fjords. Its ATK% secondary stat and 48% Lunar-Charged DMG buff at R5 are simple yet effective. Without a second Nod-Krai character for Ascendant Gleam, Prospector’s Shovel’s performance drops considerably but still remains a fine option for people who do not own Missive Windspear. |
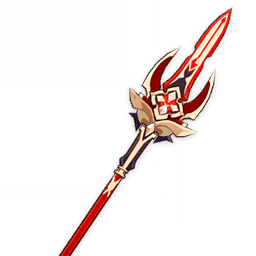
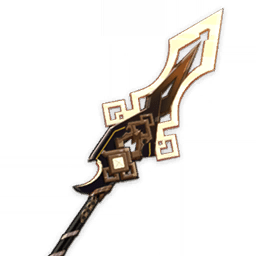
4★ Sacrificer’s Staff | As Ineffa can easily maintain this Polearm’s passive, it is a strong 4-star weapon for her, especially if she can make use of its ER passive to use her Burst more frequently. At R1, Sacrificer’s Staff performs similarly to R5 Prospector’s Shovel. |
 4★ Lithic Spear | Good pick at high refinement and in teams with 2–3 Liyue characters. Otherwise, Lithic Spear performs worse than Missive Windspear. |
 4★ Missive Windspear | A limited-event 4-star Polearm that provides ATK% and EM, which Ineffa appreciates. In rotations that only switch to her once, she can only keep the weapon passive at around half uptime (10s per rotation). |
 4★ Tamayuratei no Ohanashi | Another limited-event option. Tamayuratei’s ATK% passive, also similar to Missive Windspear, cannot be maintained at full uptime on Ineffa. Its performance is lower than that of Missive if Ineffa has low ER requirements. |
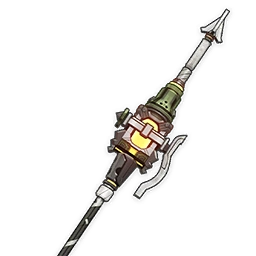
 4★ Kitain Cross Spear | A F2P option if Ineffa has high ER requirement; in 20s+ rotations, Kitain can trigger its passive twice. This can let Ineffa Burst every rotation while building minimal ER%, making it one of her best F2P options in high ER requirement scenarios. Ineffa can use her Burst after her Skill before the Energy drain happens. If the execution is slow, use her Burst before Skill. |
 4★ Dragon’s Bane | Dragon’s Bane is a rather weak option for Lunar-Charged Ineffa since the DMG Bonus passive does not benefit Lunar-Charged, which is the majority of her damage. However, this weapon gains value tremendously in Hyperbloom and Overloaded teams where Ineffa’s damage mostly cares about EM only. |
 4★ Favonius Lance | Favonius Lance is also a bad pick for Ineffa’s damage. Nevertheless, it is only marginally behind Dragon’s Bane and can pull ahead when Ineffa or her teammates’ ER requirements are high. Favonius Lance can also be Ineffa’s most notable option for her general support role, as her personal damage is not as relevant as the Energy that the weapon passive gives to the team. |
Teams
Rotation Notation
- N = Normal Attack
- C = Charged Attack
- A = Aimed Shot
- P = Plunging Attack
- E = Elemental Skill
- tE = Tap Skill
- hE = Hold Skill
- Q = Elemental Burst
- D = dash (cancel)
- J = jump (cancel)
- W = walk (cancel)
- > = switch character
- ( ) = these actions are optional; please refer to the notes below
- [ ] = repeat these actions the specified number of times
Teambuilding
- Ineffa’s main archetype is Lunar-Charged, where constant Hydro application is required to deal consistent Lunar-Charged damage.
- She generally takes the off-field role and deals damage through her A1 Passive and Lunar-Charged reaction.
- Since DMG Bonus buffs do not benefit Lunar-Charged damage, such buffs are less impactful for her personal damage.
Base Lunar-Charged
Ineffa’s intended team archetype. She deals a significant amount of personal damage, mostly via her A1 Passive enabled by the presence of Lunar-Charged reactions.
The Lunar-Charged reactions also help her teammates deal some extra damage. While each individual Lunar-Charged damage instance is usually higher than Electro-Charged, its attack frequency is less than half as fast, so the difference in potential damage output is not that big. However, unlike Electro-Charged, Lunar-Charged allows all Electro / Hydro appliers to take part in the reaction damage. Also unlike Electro-Charged, where a major issue is that building for it comes at the price of building for Talent damage, it is possible to build for both Lunar-Charged damage and Talent damage at once.
As discussed in the Lunar-Charged section, the Lunar-Charged reaction uses both EM and CRIT stats of the participants in its damage formula, so for most characters, they do not have to excessively stack EM for the reactions — a normal CRIT build that increases both Talent and Lunar-Charged damage tends to be better anyway. One of the exceptions is characters that already use EM at baseline; for example, Anemo buffers like Kazuha and Sucrose, or EM-scaling DPS units like Cyno and Sethos.
Notable Teammates
Moonsign
While Ineffa’s kit is not locked behind Ascendant Gleam, having another teammate that can increase the team’s Moonsign Level is highly recommended. This is because the Ascendant Gleam state enables various gear effects that are beneficial for Ineffa and her teams, such as the passives of 4pc SMS, 4pc NotSU, 4pc Aubade, and Prospector’s Shovel. Additionally, non-Moonsign characters in Ascendant Gleam teams can give a Lunar Reaction DMG Bonus based on their respective stats.
 Flins ★ | Flins requires a Nod-Krai teammate to fully unlock his kit, and Ineffa is the best candidate for the slot. Not only does Ineffa activate Ascendant Gleam, but also her A4 and Moonsign Benediction Passives grant myriad buffs. Ineffa also provides a shield, which lets Flins’s team run non-defensive supports with great buffing capabilities. |
Columbina ★ | The premier Hydro support for Lunar-Charged teams thanks to her powerful Lunar-Charged buffs and good personal damage. Ineffa and Columbina form a strong and flexible core that is capable of alleviating many teams due to their damage contribution alone. When paired together, Ineffa typically uses 4pc Aubade while Columbina holds 4pc SMS, as Ineffa’s damage output is often higher. This priority flips when Columbina has more investment, and both can use 4pc Aubade if there is a better 4pc SMS holder in the team. |
 Aino ★ | Aino is a free 4-star off-field Hydro applier who is quite decent in Ineffa’s Lunar-Charged teams thanks to her C1, C6, and Moonsign Benediction Passive. |
Jahoda ★ | Jahoda is a decent Anemo healer who can give the active character a 100 EM buff from her A4 Passive while holding 4pc VV for RES Shred. She can also apply off-field Hydro and Electro and, at C6, give 5% CRIT Rate and 40% CRIT DMG to Moonsign characters. However, these perks are locked behind her Skill, which requires some field time to charge. |
Hydro
Obligatory to enable Lunar-Charged. They contribute through both their Talent and Lunar-Charged damage. As Lunar-Charged ticks around every 2s, both Hydro characters with fast and slow application contribute to Lunar-Charged damage.
Columbina ★ | The premier Hydro support for Lunar-Charged teams thanks to her powerful Lunar-Charged buffs and good personal damage. Ineffa and Columbina form a strong and flexible core that is capable of alleviating many teams due to their damage contribution alone. When paired together, Ineffa typically uses 4pc Aubade while Columbina holds 4pc SMS, as Ineffa’s damage output is often higher. This priority flips when Columbina has more investment, and both can use 4pc Aubade if there is a better 4pc SMS holder in the team. |
Aino ★ | Aino is a free 4-star off-field Hydro applier who is quite decent in Ineffa’s Lunar-Charged teams thanks to her C1, C6, and Moonsign Benediction Passive. |
   Furina, Yelan, Xingqiu | Good off-field Hydro units that can deal good damage and provide sustained Hydro application. Yelan provides a ramping DMG Bonus buff to the on-fielder. Furina also offers a DMG Bonus buff that is teamwide and is bigger overall, but she requires healing to maintain it. Xingqiu’s damage reduction pairs well with Ineffa’s shield, making it more sturdy at absorbing damage; he also buffs Hydro teammates with his C2’s Hydro RES Shred. |
   Neuvillette, Kokomi, Ayato, Childe | On-field Hydro damage dealers that can be used in Lunar-Charged teams. Lunar-Charged teams can be competitive options to their current best teams. Additionally, they appreciate Ineffa’s shield to perform their combos uninterrupted. While Kokomi is best at stacking Fanfare for Furina, her AoE performance is not as good as the other three units. Neuvillette has the best of both worlds with good range, self-healing, and personal damage in both single-target and multi-target scenarios. |
Candace | Candace can provide decent Hydro application through her Burst, her Hydro infusion, and her C6. She can contribute to team DPS by building EM and CRIT for Lunar-Charged damage. |
Sigewinne | While Sigewinne’s healing is less important to her team’s survival because of Ineffa’s shield, it is still valuable for stacking Furina’s Fanfare. |
Electro
A second Electro unit helps with Ineffa’s ER requirements. They also contribute personal damage and add their own Lunar-Charged damage in the teamwide reaction procs. Electro buffers can be used to boost the team DPS.
Flins ★ | Flins requires a Nod-Krai teammate to fully unlock his kit, and Ineffa is the best candidate for the slot. Not only does Ineffa activate Ascendant Gleam, but also her A4 and Moonsign Benediction Passives grant myriad buffs. Ineffa also provides a shield, which lets Flins’s team run non-defensive supports with great buffing capabilities. |
 Fischl ★ | One of the best off-field Electro damage dealers, Fischl deals a good amount of sustained damage and generates tons of particles, all while requiring little field time to do so. Additionally, when paired with a Hexerei teammate, Fischl provides a 90 EM buff (that doubles to 180 at C6) to the on-field character that lasts 10s when they switch off. This makes her synergize even better with Ineffa’s Lunar-Charged teams. |
Ororon | Most of Ororon’s value in an Electro-Charged team is his ability to carry 4pc Scroll with full effect. However, since a large proportion of Lunar-Charged team DPS comes from Ineffa’s A1 Lunar-Charged damage, his buff becomes less impactful. Nevertheless, 40% DMG Bonus (4pc Scroll), some Energy refund (A4 Passive), and 30% ATK (his C6) hold good value for many damage dealers in Lunar-Charged teams as they still deal mostly Talent damage. |
 Sara | Sara can be used in a quickswap team to give an ATK buff to her teammates, including Ineffa. Noteworthily, C6 Sara’s CRIT DMG buff applies to Lunar-Charged damage. |
Iansan | A good option for Ineffa’s niche on-field playstyle. Since Ineffa does not have to perform any attacks while on-field, she can keep running around the enemy to maintain Iansan’s higher ATK buff. Additionally, Iansan’s DMG Bonus from 4pc Scroll can be useful for off-field damage dealers in the team. |


Anemo
Anemo characters mean Electro and Hydro RES Shred debuffs from 4pc Viridescent Venerer. They also provide other utility, such as grouping, stat buffing, or survivability. Some of them also deal good Swirl damage and contribute to the team’s Lunar-Charged damage via AoE Swirl or Elemental Absorption. Notably, Anemo units with innate or infused attacks — e.g. Sucrose, Ifa, and C6 Lynette — can drive characters such as Xingqiu, Yelan, and Beidou well.
Sucrose ★ | Sucrose is Ineffa’s best Anemo buffer with her teamwide EM share. She can act as the on-field unit for the team, triggering Swirl and Lunar-Charged (through Swirl’s AoE application and her Burst’s Elemental Absorption) for extra damage. |
Jahoda ★ | Jahoda is a decent Anemo healer who can give the active character a 100 EM buff from her A4 Passive while holding 4pc VV for RES Shred. She can also apply off-field Hydro and Electro and, at C6, give 5% CRIT Rate and 40% CRIT DMG to Moonsign characters. However, these perks are locked behind her Skill, which requires some field time to charge. |
Ifa | Ifa gives the whole team a good Lunar-Charged DMG Bonus buff based on the amount of Nightsoul points the team possesses. Ororon and Iansan are is highly synergetic with Ifa for this purpose. Ifa’s CRIT builds remain viable in AoE scenarios since his Lunar-Charged damage can crit. |
   Kazuha, Lynette, Venti, Sayu | Anemo units with Elemental Absorption that can be used to trigger Lunar-Charged even in single-target scenarios. They also provide a range of useful utility, from Kazuha’s DMG Bonus and Lynette’s ATK buffs, to Venti’s powerful grouping and Sayu’s decent teamwide healing (while rolling in her Skill state). |

Flex
In a pure Lunar-Charged team, the flex slot is usually taken by an Anemo support unit (see above); however, other characters whose Element does not interfere with the Electro–Hydro double aura can still be useful. Additionally, some damage dealers can use the Ineffa–Hydro core in their teams for extra damage.
Xilonen ★ | Xilonen has a RES Shred debuff in her Skill with great uptime, the ability to activate the full effect of 4pc Scroll, and great single-target healing to top it off. However, it can be tricky for her to trigger both Electro and Hydro Crystallize for the 4pc Scroll set effect. As such, Xilonen can use 4pc Instructor or 4pc Noblesse Oblige to buff the whole team instead, especially when Lunar-Charged damage is the team’s focus (e.g., Flins–Ineffa teams). |
 Bennett | Bennett gives healing and a massive Flat ATK buff to the on-fielder without messing up the Lunar-Charged reaction too much. Ineffa can stay on-field to get Bennett’s buff if there is no better buff user in the team. |
Example Teams
This is not a comprehensive list of teams. The inclusion or exclusion of any given team does not necessarily reflect its power level.

Ineffa, Flins, and Sucrose form a strong team core, with Columbina as the best Hydro applier, and Aino being a good F2P alternative. For optimal team DPS, either Ineffa or Columbina should hold 4pc SMS, with the other one (who deals more damage) using 4pc Aubade. If Flins is heavily invested, put Ineffa and Columbina on 4pc TotM and 4pc SMS, instead. Similarly, Aino holds 4pc SMS while Ineffa uses 4pc Aubade or 4pc TotM, depending on Flins’s investment.
Ineffa can cast her Burst every rotation or every other rotation (with appropriate ER), without much difference in team DPS. Casting her Burst every rotation becomes better when Ineffa’s ER requirements are low or when her Burst’s EM buff to Flins is more important than her personal damage loss from building ER.
Sample Rotation (Columbina)
Ineffa E (Q)¹ > Columbina (Q)¹ E > Sucrose Q/ED² N1 > Flins combo > Sucrose N1 ED/C³
¹Alternate between their Bursts. Do not cast Ineffa’s Burst in the first rotation. Use Columbina’s Burst after her Skill in the first rotation.
²Use Sucrose’s Burst whenever available; otherwise, use her Skill.
³If neither Sucrose’s Burst nor Skill is available for the next rotation, use her Charged Attack instead.
Sample Rotation (Aino)
Ineffa E (Q) > Aino EQ > Sucrose ED (Q)¹ > Flins combo
¹Burst when available

A Double Hydro Neuvillette team variant, featuring Ineffa. She is an improvement over Fischl thanks to her better damage output and a shield for C0 Neuvillette. While Ineffa’s Burst can be used to extend her Birgitta uptime and for an EM buff, it is generally better to skip it entirely to reduce rotation length.
Sample Rotation
Neuvillette E > Furina ED > Kazuha Q > Ineffa E > Kazuha tEP > Furina Q > Neuvillette C Q E C > Kazuha tEP > (Ineffa Q) > Neuvillette 2[C]

A comfy and easy-to-play team with Ineffa’s shield and Kokomi’s healing. Ineffa’s particle generation helps Beidou’s ER requirements while Lynette’s ATK buff increases both Ineffa’s and Beidou’s damage output.
Sample Rotation
Kokomi E > Ineffa E Q > Beidou EQ N1 > Lynette (E)¹ Q N1 > Kokomi Q 6-7[N2D] > Lynette E > Beidou E N2
¹With C4+ Lynette or R4+ Sacrificial Sword

Ineffa provides a much-appreciated shield and EM buff, and allows Sethos to double-dip in both Lunar-Charged and Talent damage thanks to his EM-scaling Talents.
Sample Rotation
Ineffa E Q > Furina ED Q > Jean EQ > Sethos combo > Jean E N2

Lunar-Charged is an upgrade over Keqing’s quite underwhelming Electro-Charged teams.
Sample Rotation
Ineffa E Q > Yelan Q N1 E N1 > Kazuha tEP N1 > Keqing E N1 Q E 4[N1C] > Yelan E N3 > Kazuha tEPQ

A powerful Lunar-Charged team with Sucrose as the Anemo driver. Fischl can provide the active character a 90 EM buff (that doubles to 180 at her C6) that lasts 10s even after they have switched off-field. Thus, with careful rotation, she can buff the whole team with high uptime.
Sample Rotation
Fischl E N1 > Columbina E Q > Ineffa E N1 > Sucrose N1 EDQ N4 spam¹ > Fischl N1 Q > Columbina N2 > Ineffa Q > Sucrose (E) N4 spam¹
¹Until Oz leaves the field

With the help of Ororon, Ifa can stack his A1 Passive for a considerable partywide Lunar-Charged DMG Bonus buff.
Sample Rotation
Ineffa E Q > Xingqiu EDQ N1 > Ororon EN1Q > Ifa combo¹
¹Stay on-field with Ifa for around 3s after his Skill state ends

A hypercarry team where Ineffa is buffed by Sucrose’s EM buff, Sara’s Flat ATK and (at C6) CRIT DMG buffs, and Aino’s C1 and C6 buffs. Aino also enables Moonsign: Ascendant Gleam, so Ineffa can use 4pc NotSU while Aino holds 4pc SMS.
Sample Rotation
Aino EQ > Ineffa E > Sucrose ED N3 > Sara E C Q > Ineffa Q > Aino E > Sucrose (ED) (Q) N3 > Sara E C > Ineffa N3D N2¹ > Sucrose N3
¹To catch Sara’s particles

A comfy Navia team where Ineffa takes the place of the buffer for Navia. Nevertheless, Ineffa’s personal damage can still make up for the loss of buffs on Navia.
Sample Rotation
Ineffa E Q > Xilonen Q > Furina ED Q > Xilonen E N2 > Navia Q hE N3D N2 > Xilonen E N2 > Navia hE 3[N2D]

This team deals both significant Lunar-Charged and Lunar-Crystallize damage. Xilonen provides Electro, Geo, and Hydro RES Shred.
Sample rotation
Columbina E (Q)¹ > Xilonen E N2 > Ineffa E (Q)¹ > Zibai combo
¹Burst when available.

Ineffa provides a much appreciated shield and personal damage to this Wanderer team. Either Faruzan or Wanderer should carry 4pc VV for team DPS.
Sample Rotation
Ineffa E Q > Yelan Q > Faruzan (E C) Q N1 > Yelan E N1 > Wanderer E combo > Yelan E
Overvape

Ineffa’s good Electro application allows some Overloaded damage and better Vape consistency for Pyro damage dealers. She also contributes a significant team DPS share because her A1 Passive can still have full uptime dealing Lunar-Charged damage, as the reaction thunderclouds (the condition for A1 attacks) stay for a few seconds even after the Electro–Hydro auras are consumed.
Anemo Overvape teams are notable for their Transformative Reaction output. Using an Anemo in the flex slot, these teams trigger a variety of reactions including Lunar-Charged, Overloaded, Swirl, and Vape, and they perform exceptionally well in multi-target fights thanks to multiple chain-reactions being a result of AoE Swirls.
Notable Teammates
Moonsign
When used together, Moonsign characters (including Ineffa) unlock the full potential of each other’s kit and enable various artifact and weapon effects. Among them, 4pc SMS and 4pc NotSU are the most notable for being capable of buffing Pyro DPS units even if they are not a Moonsign character.
Columbina | Columbina is the best Hydro support for buffing Ineffa’s damage, and is also often the best Hydro unit for these Overvape teams. As a bonus, she deals significant damage herself. |
 Aino | Ineffa enables Lunar-Charged and Ascendant Gleam, both of which increase Aino’s rate of Hydro application to the point that she becomes a viable Vape enabler. Additionally, Aino’s C1 and 4pc SMS EM buffs boost Vaporized hits. |
Jahoda | Jahoda heals and buffs the active character with 100 EM through her A4 Passive. She can also apply off-field Hydro and, at C6, give 5% CRIT Rate and 40% CRIT DMG to Moonsign characters. However, these perks are locked behind her Skill, which requires some field time to charge. |
Hydro
Hydro characters are indispensable for various Lunar-Charged subarchetypes. Since most Pyro DPS units play on-field, off-field Hydro appliers are needed. However, Xiangling can allow for either on-field or off-field Hydro units in her teams.
Columbina | Columbina is the best Hydro support for buffing Ineffa’s damage, and is also often the best Hydro unit for these Overvape teams. She deals significant damage herself, as a bonus. |
Aino | Ineffa enables Lunar-Charged and Ascendant Gleam, both of which increase Aino’s rate of Hydro application to the point that she becomes a viable Vape enabler. Additionally, Aino’s C1 and 4pc SMS EM buffs boost the Pyro DPS unit’s Vaporized hits. |


Pyro DPS
Ineffa provides Electro application, which enables Overloaded damage and prevents Pyro damage dealers from overconsuming Hydro aura, increasing their Vape consistency. Ineffa also provides a shield for interruption resistance and boosts their reaction damage via her A4 Passive.
Durin | In Ineffa Overvape teams, Durin should use his White form to shred enemies’ Electro RES (which benefits Lunar-Charged damage), while also dealing sizable Vape and Overloaded damage. Thanks to his RES Shred, Durin can be a good replacement for the VV Anemo slot in Flins’s teams. |


Anemo
While it is hard to achieve Pyro Swirl, Anemo can still bring valuable merit via Electro and Hydro Swirls for 4pc VV’s RES Shred. Some Anemo characters like Jean, Sayu, or Xianyun can provide other utility, such as grouping or healing (for Furina’s Fanfare stacking).
Some Anemo characters can perform in an Overvape team — an archetype where Anemo characters deal Pyro Swirl or Pyro Absorption, which in turn triggers other reactions (chain-reactions). Xiangling and Bennett are the main enablers for this playstyle.
Sucrose | Sucrose’s EM share helps both the Lunar-Charged damage and the damage dealt by the Pyro DPS’s Overloaded and Vape. In an Anemo Overvape team with Xiangling, Sucrose is able to perform Guoba Swirl for Pyro RES from 4pc VV. Her flexibility in rotation and combo also allows her to perform well as the team driver. |
Jahoda | Jahoda heals and buffs the active character with 100 EM through her A4 Passive. She can also apply off-field Hydro and, at C6, give 5% CRIT Rate and 40% CRIT DMG to Moonsign characters. However, these perks are locked behind her Skill, which requires some field time to charge. |
 Kazuha, Lynette, Sayu, Jean | These characters use Bennett’s self-aura to trigger Pyro Swirl or Pyro Absorption. Kazuha provides DMG Bonus for the Hydro unit and strong on-demand grouping. Both his Plunge and Burst can absorb Pyro to trigger chain-reactions, dealing respectable extra Pyro reaction damage on top of Electro and Hydro Swirl. Lynette buffs the team with ATK%, and at C6, she can trigger Weapon Swirl in conjunction with Bennett’s C6 for easy 4pc Viridescent Venerer RES Shred. Sayu absorbs Bennett’s self-aura onto her Skill during her rolling time. Her healing is notable for Furina’s Fanfare as well. Jean’s Burst Swirls Pyro off the Pyro aura that Bennett applies to the active character. This allows for easy 4pc VV setup and also makes Jean deal some decent damage via Pyro Swirl that can trigger Overloaded and Vape. |
Chasca | Chasca converts her bullets into the Elements of her teammates. She acts as a multi-Element DPS who simultaneously deals Electro, Hydro, and Pyro damage while triggering Lunar-Charged, Vaporize, and Overloaded reactions. |

Flex
The fourth flex slot can be occupied by a second Hydro or Electro for more Lunar-Charged uptime, or by a buffer to improve the team’s existing damage dealers.
 Bennett | Bennett is the premier ATK buffer, and most Pyro damage dealers happen to have ATK scaling and can use Bennett well. His Pyro self-aura can be helpful to some Anemo units with Elemental Absorption in an Anemo Overvape team. |
 C6 Chevreuse | At C6, Chevreuse can give up to 40% ATK (A4 Passive) and 60% Electro and Pyro DMG Bonus (C6). While the DMG Bonus buff is only useful for the Pyro DPS since Ineffa does not use DMG Bonus well, Chevreuse’s teamwide ATK% buff is universally useful. |
 Pyro Traveler, Mavuika | 4pc Scroll holders that can trigger the set’s full effect for all three Elements (Pyro, Electro, Hydro) thanks to their off-field application. Pyro Traveler and Mavuika also provide a further DMG Bonus buff to the on-fielder via their C1 and A4, respectively (although the latter’s buff is often much bigger). |
Xilonen | Xilonen’s strength lies in her ability to shred all three Elements for the team (Pyro, Electro, Hydro). However, it is hard to trigger Pyro Crystallize for 4pc Scroll, and Electro or Hydro Crystallize is not as useful. Thus, Xilonen can hold 4pc Instructor for a larger team buff. |
 Zhongli | Zhongli is a downgrade to Xilonen in terms of buff. His shield is also not needed because Ineffa already gives out a shield. Still, he’s a decent option if players lack the superior buffers for the team. |
 Electro | Any Electro unit who deals good damage or provides ample buffs can be used as the fourth flex slot without much issue. |
Example Teams
This is not a comprehensive list of teams. The inclusion or exclusion of any given team does not necessarily reflect its power level.

Durin is a good off-field Pyro DPS in this team thanks to his Electro and Pyro RES Shred and decent personal damage output. Flins is a good on-field DPS for this team, but Fischl is a competitive alternative thanks to her EM and ATK% buff, as well as her Hexerei status that doubles Durin’s RES Shred.
The sample rotation for the Fischl team below has Columbina on 4pc NotSU and Ineffa on 4pc Aubade. If the artifact placement is swapped, use Ineffa on-field instead. Additionally, if both Ineffa and Columbina use 4pc Aubade, use Durin on-field to maintain the 4pc effect of Aubade on his two teammates.
Sample Rotation (Flins)
Ineffa E (Q)¹ > Columbina E (Q)¹ > Durin 2[E]Q > Flins combo
¹Use when available.
Sample Rotation (Fischl)
Fischl N1 E > Durin 2[E]Q > Columbina E Q > Ineffa E N2 > Columbina combo¹ > Fischl N2 Q > Durin 2[E] > Columbina N3 > Ineffa Q > Columbina combo¹
¹Columbina can use N3D or N2CD to fill up her field time until Oz leaves the field.

A simple yet effective Overvape Yoimiya team. Though rarely optimal, Ineffa can Burst every rotation to give Yoimiya an EM buff at the cost of her personal damage. Aino’s additional Hydro application from her C2 helps Yoimiya’s Vape consistency, and 4pc NotSU is Yoimiya’s best set in this team.
Sample Rotation
Ineffa E (Q) > Aino EQ > Bennett EQ > Yoimiya E 3[N5D] > Bennett E

Hu Tao appreciates Ineffa’s shield and the extra Overloaded damage enabled by her Electro application. The Ineffa–Aino pair also enables 4pc NotSU, which is Hu Tao’s best set in this team. Similar to the Yoimiya team above, Ineffa can choose to build ER to Burst every rotation to maintain her A4 buff uptime.
Sample Rotation
Ineffa E (Q) > Aino Q E > Yelan EQ N1 > Hu Tao combo

A comfy Anemo Overvape team with Ineffa’s shield for damage tanking and interruption resistance. It is crucial to learn Guoba Swirl for maximized damage in this team. If Sucrose uses Sacrificial Fragments for the extra Skill use, time it so that she can Guoba Swirl with every Skill cast.
Sample Rotation
Ineffa Q > Xingqiu Q N1 > Xiangling ED > Sucrose N1 ED N2 (ED) 2[N3D] > Xiangling Q N1 > Ineffa E N1 > Xingqiu ED N2 > Xiangling N2 ED > Sucrose N1 ED N1 Q 4[N3D]

In this Overvape team, Chasca deals all three of Electro, Hydro, and Pyro damage and triggers a myriad of reactions, including Lunar-Charged and Vaporize. Ineffa can forgo building ER and cast her Burst every other rotation in this team.
Sample Rotation
Ineffa E (Q) > Furina ED Q > Bennett EQ > Chasca E 4[C] (Q/C)¹ > Bennett E
¹Burst when available, otherwise hold Chasca’s Charged Attack until she falls to the ground
Hyperbloom / Quickbloom

With a decently fast hit rate from her Birgitta (every 2s), Ineffa competes with Shinobu and Raiden, the other best Hyperbloom triggers in the game. However, Ineffa trades Raiden’s faster hit rate (every 0.9s) for a shield in teams without a sustain; and Ineffa’s Hyperbloom proc rate is not that much behind Shinobu’s (every 1.5s), so she does not lose a significant number of Hyperblooms compared to her.
In addition, in teams with some Lunar-Charged uptime (e.g. teams with Double Hydro cores), Ineffa can deal a considerable amount of A1 damage. This compensates for the reduced Hyperbloom procs and makes her arguably the best option in such teams.
Ineffa should build a balanced amount of EM, ATK, and CRIT in a Hyperbloom team with decent Lunar-Charged uptime. Her A4 Passive converting her ATK to EM is especially useful for these teams.
Notable Teammates
Hydro
Hydro units continue to be one of Ineffa’s most important teammates. A Double Hydro core can be used to attain better Lunar-Charged uptime by consuming the excess Dendro aura. This allows Ineffa to deal A1 damage to contribute significant Lunar-Charged damage.
Columbina | Columbina can play as both the on-field and off-field Hydro applier for Ineffa Hyperbloom teams. When played on-field, she utilizes the Verdant Dews generated from Lunar-Bloom reactions to deal respectable direct Lunar-Bloom damage from her special Charged Attack. However, Columbina needs a second Hydro unit in the team to maintain the Electro–Hydro double auras for Lunar-Charged uptime. |
Aino | While Aino’s Hydro application is not the fastest for Hyperbloom teams, her buffing capability, such as her C1, C6, and 4pc SMS, makes her a viable consideration in teams where Lunar Reaction damage is more focused. |
Dendro
Dendro appliers for Dendro Core generation. The stronger the unit’s Dendro application is, the more Hyperbloom and the less Lunar-Charged for Ineffa, and vice versa. A strong Dendro applier and weaker Hydro applier can also make the team a “Quickbloom” one, increasing Aggravate and Spread uptime to buff the teams Dendro / Electro DPS, at the price of Hyperbloom and Lunar-Charged damage.
 Lauma | Lauma is the premier Hyperbloom buffer thanks to her Burst’s damage increase to Hyperbloom. Her A1 Passive’s Hyperbloom CRIT buff is only active with Moonsign: Nascent Gleam, but Ineffa compensates for this loss by enabling effects from Moonsign: Ascendant Gleam and dealing solid personal damage. |


Electro
Off-field Electro characters can slot in to deal extra damage, especially in Quickbloom teams where they get some Aggravate. Units that do not steal Ineffa’s Hyperblooms should be used. On-field Electro units would steal her Hyperbloom during their uptime; however, Ineffa still has synergy with them thanks to her shield and EM buff.

Example Teams
This is not a comprehensive list of teams. The inclusion or exclusion of any given team does not necessarily reflect its power level.

In this team, Columbina is the on-field DPS, capable of dealing respectable damage output through her Skill’s Gravity Interference and special Charged Attacks. Aino is a good fourth slot in the team with her Hydro particle generation that helps Columbina, and her Hydro application that enables Lunar-Charged uptime for Ineffa.
Sample Rotation
(Lauma N1)¹ > Columbina E Q > Lauma hE Q > Ineffa ED (Q)² > Aino Q E > Columbina CD spam³
¹First rotation only, for Verdant Dew stacking.
²Burst whenever available.
³Until her Skill is ready.

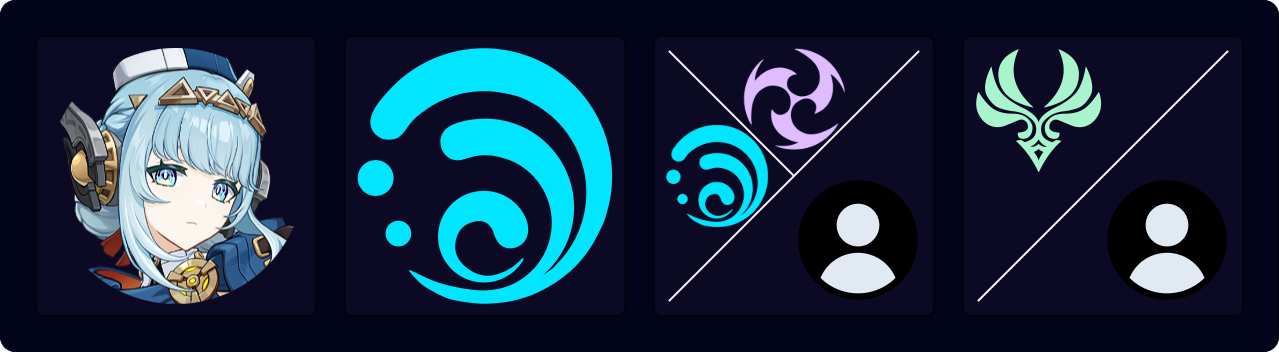
Ineffa can be considered a comfier alternative to Raiden and Shinobu as she offers a shield, allowing a smooth on-field experience with Nahida. She also deals a handsome amount of A1 Lunar-Charged damage thanks to the occasional Lunar-Charged reactions on the enemy.
Sample Rotation
Nahida E (Q) > Ineffa E (Q) > Xingqiu Q N1 > Yelan EQ N1 > Nahida N3 E N3D N3 > Xingqiu N1 ED N2 > Yelan E N4 > Nahida N3D N3

This Quickbloom team does not have as much Lunar-Charged uptime as the previous team, so Ineffa’s A1 Lunar-Charged is next to nonexistent. However, being a shielder Hyperbloom trigger with full uptime and an EM buff makes her a competitive option to Shinobu.
Sample Rotation
Nahida E Q > Yelan Q N1 E > Ineffa E N1 > Alhaitham Q > Nahida¹ N1 E > Alhaitham N3D N3D N3D N3 > Yelan E N2 > Ineffa Q > Alhaitham hEP N2CD N3
¹If you cannot swap to Nahida safely or due to ping, you can instead use her N1 E before Alhaitham Q.

Another good Quickbloom team where Ineffa buffs Cyno with her EM share, helps him regain his Burst faster with her particle generation, and enables some Lunar-Charged damage. Baizhu enables Hyperbloom and some Quicken uptime for Cyno, and stacks Fanfare for Furina. Baizhu’s shield being weak is not an issue in this team thanks to Ineffa’s stronger shield.
Sample Rotation
Ineffa E > Furina ED Q > Baizhu EN1Q > Ineffa Q > Cyno combo
Overloaded
Ineffa can fit in Chevreuse Overloaded teams as an Electro shielder. Despite not being able to trigger Lunar-Charged and make full use of her kit, Ineffa still provides substantial benefits to the team: decent particle generation, a good shield that can become tanky when built for, and great Electro application in both application rate and uptime. Her strong application can also allow her to deal good Overloaded damage in some teams. All of these make her one of the best options for such teams, even without any Lunar-Charged uptime.
Notable Teammates
Chevreuse | The bread-and-butter enabler of modern Overloaded teams, providing everything the team needs: healing, Pyro and Electro RES Shred, ATK%, and (at C6) Pyro and Electro DMG Bonus. However, she locks you into a team with only Pyro and Electro units. |
Pyro DPS
Ineffa’s shield is valuable on these Pyro characters for interruption resistance without having to use weaker options in terms of damage, such as Thoma or Dehya.
Example Teams
This is not a comprehensive list of teams. The inclusion or exclusion of any given team does not necessarily reflect its power level.

Ineffa is the strongest shielder option for Arlecchino, Lyney, and Yoimiya in Overloaded teams, allowing them to use Bennett for buffing instead of resorting to Thoma / Dehya and another Electro off-fielder. Ineffa’s Overloaded damage is not negligible and she should build full EM to maximize her personal damage. However, a shieldbot build is still serviceable if players want their Pyro DPS to be more protected.
4pc TotM is Ineffa’s BiS set in this team.
Sample Rotation (Arlecchino)
Arlecchino E > Ineffa E > Bennett EQ > Chevreuse hEQ > Arlecchino E 5[N3D] N3
Sample Rotation (Lyney)
Ineffa E > Bennett EQ > Chevreuse hEQ > Lyney 2[C] QE¹/C² C E C
¹Cancel Lyney’s Burst with his Skill after colliding with enemies
²Use an additional Charged Shot if his Burst is unavailable
Sample Rotation (Yoimiya)
Ineffa E > Bennett EQ > Chevreuse hEQ > Yoimiya E 3[N5D]
Other Teams

While Ineffa’s power lies within her Lunar-Charged reaction, she can still be used outside of Lunar-Charged teams thanks to her other utility, such as her shield, EM buff, and Electro application.
Example Teams
This is not a comprehensive list of teams. The inclusion or exclusion of any given team does not necessarily reflect its power level.

Ineffa is another decent shield option for Tighnari, providing an EM buff and Electro Resonance to the whole team.
Sample Rotation
(Nahida N1)¹ > Yae E N1 2[E N2] > Ineffa E Q > Nahida E Q N1 > Tighnari E 3[C] Q > Yae N1 Q 3[N1E] N2 > Nahida N3D N3C > Tighnari E 3[C] Q
¹First rotation only
Credits
Writer: acerbus114
Contributors: caramielle., sew, lostguide, luke_260, pjeljr, irokei, heartofhope, haafr, pulsar79, hayanochie.
Team images made with the KQM portrait generator.